valonic 13 pin trailer plug pin, black incl. wiring template connector for caravan,
Featured

|
£ 7.99 |
To Shop
|
| COMPARE ALL WEBSHOPS (1) | ||
 Description
Amazon
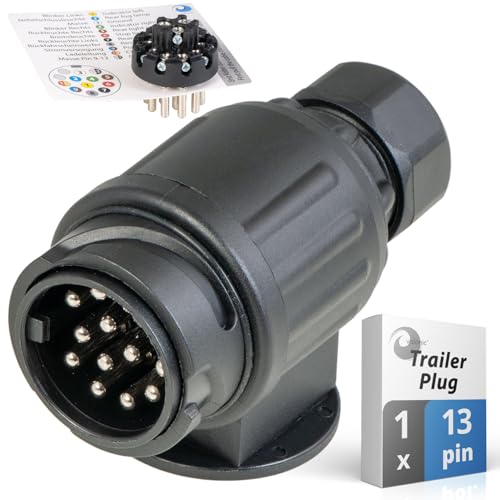
TEMPLATE: The car indicator is activated, but the brake light lights up on the car trailer? The supplied wiring template simplifies the wiring of the trailer cable harness enormously. This significantly reduces the risk of wiring errors. HIGH-QUALITY: Reliable and durable due to galvanised copper contacts SPECIFICATIONS: The 13-pin trailer hitch connector measures 9.7 x 5.8 x 4.8 cm and weighs 138 grams. Suitable for 12V or 24V wiring. PREPARATION: 1. Unscrew the thinner end of the plug. 2. Unscrew the middle part of the plug. 3. 3. remove the plug part from the housing. 4. now there are 6 individual parts in the following order (from left to right): End part with logo, component with contact pins, screw connection, sealing ring, strain relief, end nut. APPLICATION: 1. pull the wiring harness through in this order: Nut, strain relief, seal and screw connection. 2. insert the component with contact pins into the template so that you can see the screws and the template label. Insert all cables into the respective screw terminals of the connector according to the template labelling and screw tight. 4. Remove the template and insert the component with contact pins into the end part (nose to nose). Assemble all parts in reverse order.


Compare webshops (1)
TEMPLATE: The car indicator is activated, but the brake light lights up on the car trailer? The supplied wiring template simplifies the wiring of the trailer cable harness enormously. This significantly reduces the risk of wiring errors. HIGH-QUALITY: Reliable and durable due to galvanised copper contacts SPECIFICATIONS: The 13-pin trailer hitch connector measures 9.7 x 5.8 x 4.8 cm and weighs 138 grams. Suitable for 12V or 24V wiring. PREPARATION: 1. Unscrew the thinner end of the plug. 2. Unscrew the middle part of the plug. 3. 3. remove the plug part from the housing. 4. now there are 6 individual parts in the following order (from left to right): End part with logo, component with contact pins, screw connection, sealing ring, strain relief, end nut. APPLICATION: 1. pull the wiring harness through in this order: Nut, strain relief, seal and screw connection. 2. insert the component with contact pins into the template so that you can see the screws and the template label. Insert all cables into the respective screw terminals of the connector according to the template labelling and screw tight. 4. Remove the template and insert the component with contact pins into the end part (nose to nose). Assemble all parts in reverse order.
 Product specifications
 Related results


